The fact is that I sometimes pick hikes at random. My Oyster Dome hike was one of those semi-random “where should I go this weekend” type trips.
Usually, I try and have my weekend planned by Wednesday night, so I can be ready to head out on Friday or Saturday and not have to spend too much time prepping.
Hiking Oyster Dome was an interesting adventure and so typical of the PNW in the fall.
Basic Info On the Oyster Dome Trail
Depending on what site you look at, and what path you take, this is a 5-8 mile hike, with a moderate rating. That seems pretty accurate to me. Here are the links to the Oyster Dome hike on AllTrails and WTA.
I hiked it in the late Fall and I definitely had the place to myself, but I also got zero view at the top. Summer I can see this trail being super busy. I would like to get back out there in the spring on a clear day and actually get to see the view.
I chose Oyster Dome because it had only a moderate gain, was a decent length hike, and potentially had some good views to offer. Now I wasn’t overly hopeful to get some breathtaking views since I was headed out on a cloudy day. I’m a master at hiking hills when they are covered by clouds and you can’t see anything.
Parking at the Oyster Dome Trail
The first challenge I hit was that when you drop “Oyster Dome Trailhead” into Google, it sends you to the lower trailhead on Chuckanut Drive. The only problem is that there isn’t actually a parking lot down there and you have to find a place alongside the road to park.
As it was dark as hell still when I got there, I skipped the hard parking, swung around, and went up to the parking lot at the Samish Overlook.
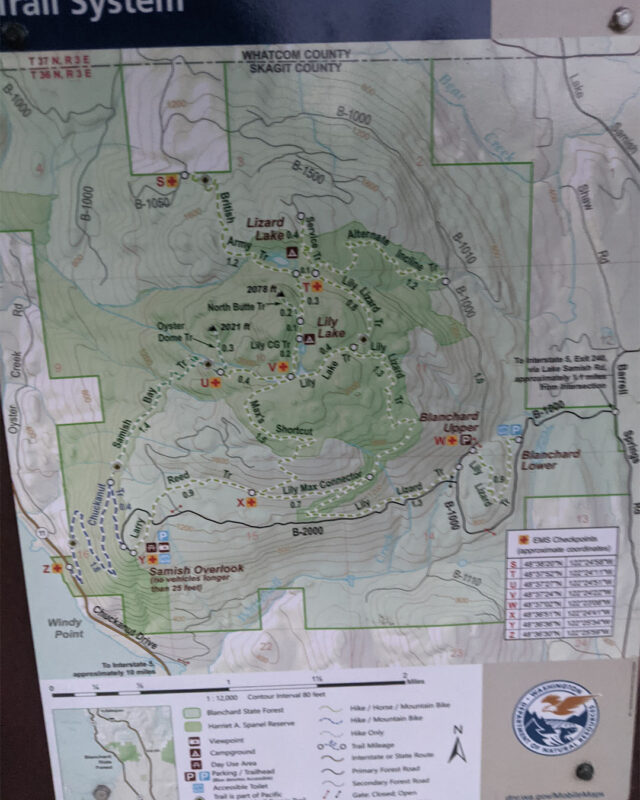
Up there is a proper parking lot, informational signs, and a pit bathroom. Unless you really have your heart set on doing the switchbacks all the way from Chuckanut Drive, I’d suggest parking up there.
Alternatively, there are two parking lots at the Blanchard Mountain Trail just down the road. It will make your hike to Oyster Dome longer, but if you want a little extra time on the trail, or the Samish Parking lot is too busy, these might be good alternate parking spots.
If you want to come at the trail from the north, there are some access trails off of B-1050 and B-1500 as well as the Blanchard Hill – Alternate Incline Trail. These also give you shorter access to the Lizard Lake Campground.
My Hike of Oyster Dome
Parking at the overlook, I decided to take the long way around to get to Oyster Dome, wanting to see as much of the park as possible, including Lizard Lake and Lily Lake.
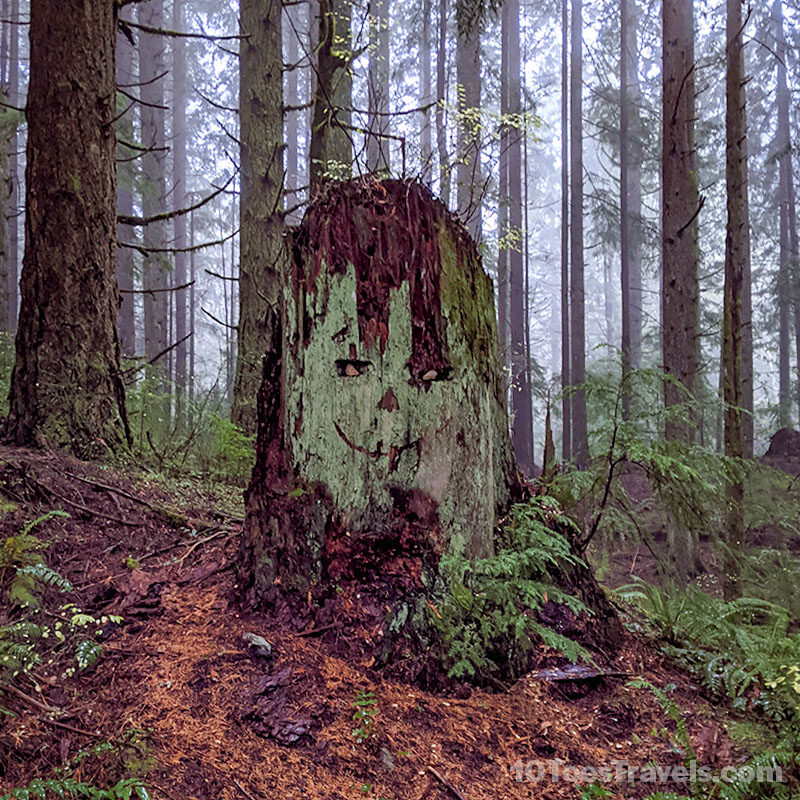
The weather was gray and threatening rain as I headed out down the Larry Reed Trail. The hike along that trail as well as the Lily Max Connector, is for the most part, a pleasant walk in the woods. I enjoyed checking out all the ferns, mosses, trees, and tree stumps.
The Lily Lizard section of the trail was a little more challenging and as I approached Lizard Lake, the mist that had been floating around, decided to start ganging up and falling from the skies. I was glad I had my raincoat and got things buttoned down as I wandered into the campground.
Honestly, I hadn’t scouted the location enough to know anything about either Lizard Lake or Lily Lake campgrounds, or that they even existed.
Lizard Lake and Lily Lake Campgrounds
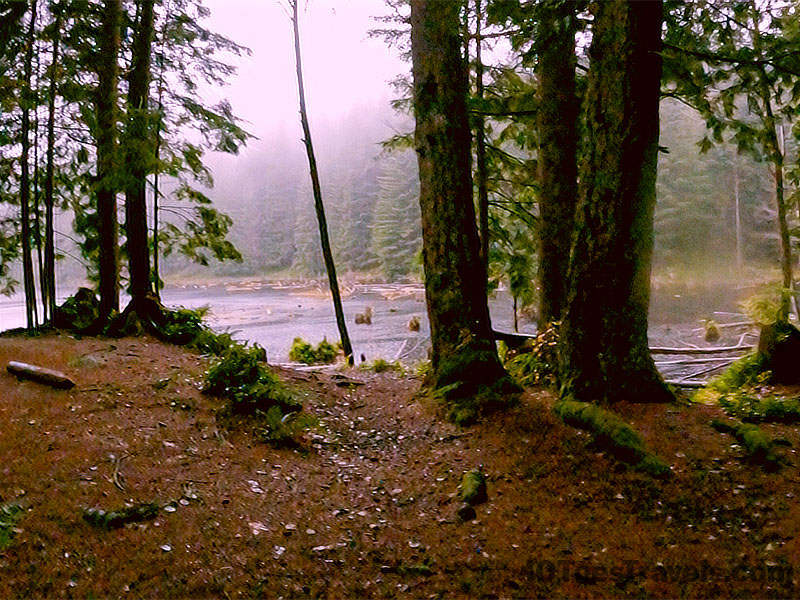
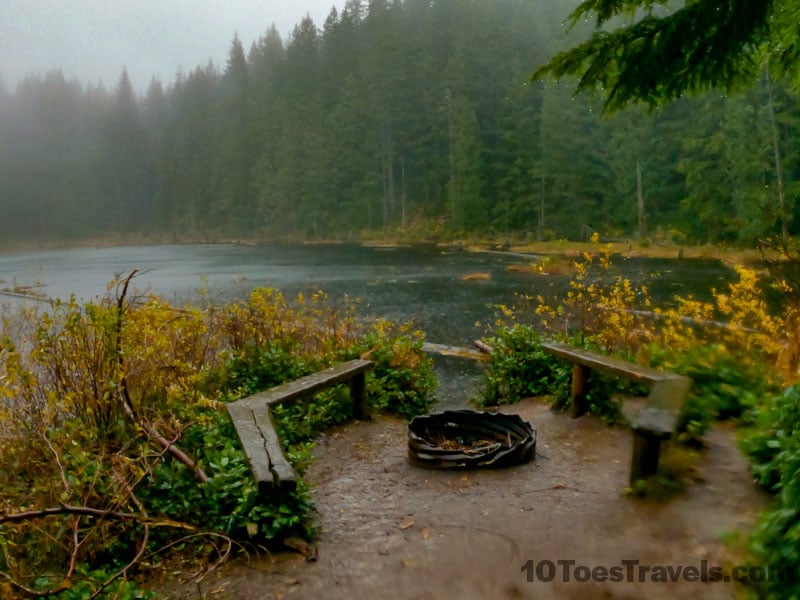
These are two adorable little hike-in campgrounds with a small number of established camp spots to use. Lizard Lake in particular, has some awesome spots that are pretty much right on the lake. I can see this place being pretty busy in the summer, and the camp spots aren’t that far apart. It might be fun early or late in the season. When I was there, I had the place to myself.
Lizard-Lily Connector Trail
The rain falling harder yet, I made my way off onto the Lily-Lizard Lake connector trail. This one is definitely more sketchy than the bulk of the main trails. No wild scrambles with the threat of life-ending falls, but it is more than a walk in the woods.
I am annoyed that I hadn’t done more research as I missed the side-quest of going up North Butte Trail to the summit which is actually higher than Oyster Dome. Next time I guess, on a day when I can see, well… Anything.
My Ascent of Oyster Dome
Mother Nature was intent on making my hike extremely wet, and as I took the right turn onto the main trail and headed toward the Oyster Dome trail, the rain kicked it up to second gear.
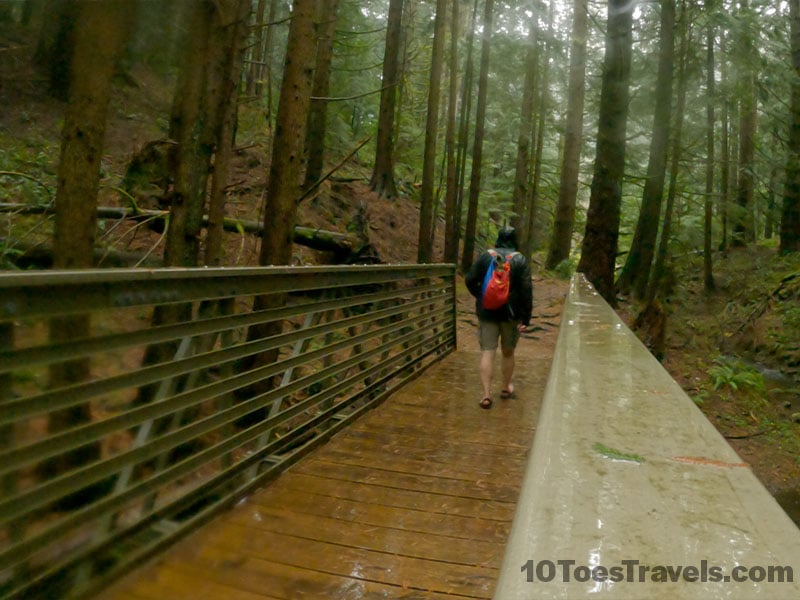
From the cutoff trail over to Oyster Dome trail, is a pretty walk. I do really love bridges, especially when they are in the middle of nowhere. Fairly randomly, there is a nice metal bridge. I’m always impressed by the things people build on trails far from where they can truck things in.
From this point on, the trail was steep, and solid ascent as you approach the viewpoint.
100 yards from the Oyster Dome overlook, Mother Nature dropped the hammer, and stepping out onto the giant dome of rock, I found that the rain had turned to slush and was blowing sideways. My view was a wall of white, though I could see the bottom of the hill where I would land if I went sliding off the side. Time to back up a step.
Very quickly I checked it out, shot some video, and with my fingers freezing in the driving slush, started back down. Should I have had my rain pants on at this point, yeah, but I was already too wet for them to help much.
Until I took the turn onto the Oyster Dome Trail proper, I had only seen two other people. Once I started to power climb through the rain to the top of the hill, I finally started running into other people.
Now plenty of people were headed up the trail as I came down, and as usual, I got a fair number of comments on me hiking in my sandals.
Back to the Overlook
Fleeing the slush-blown viewpoint, I headed down the Samish Bay trail back toward the parking lot. Honestly, I’m glad I did this trail the long way around. The trip back down was a nice series of switchbacks. There were a few cute little streams to cross, and I could see this being a challenging hike going from the other direction, especially if I was hiking it from Chuckanut.
BTW the photos are a little blurry. Everything, including my camera was very wet.
Am I bummed that I didn’t get the awesome view from the top? Yeah, I had a good hike, but not getting to see anything just means I get to go back and do it again. Maybe I’ll be crazy and hike it form Chuckanut next time.
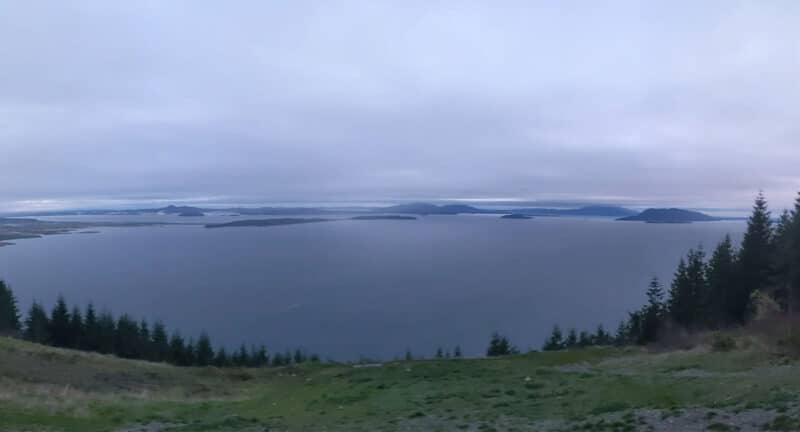
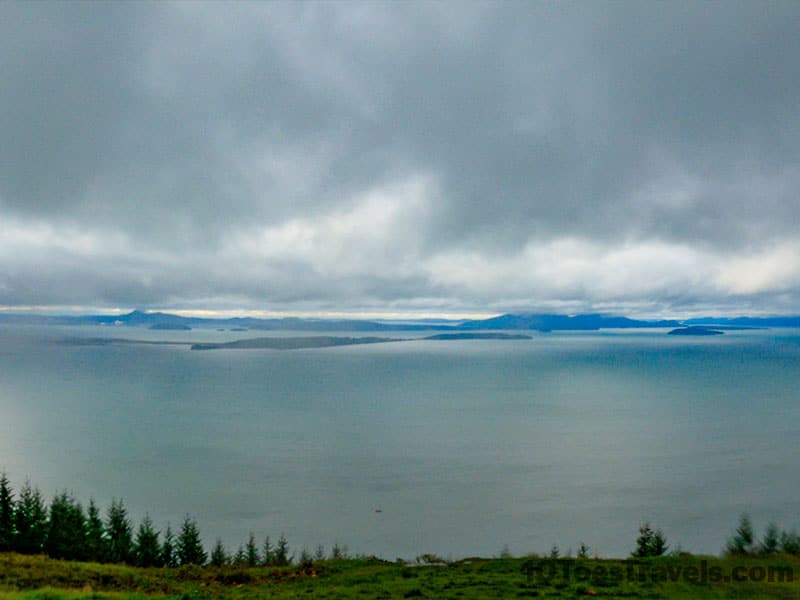
At least by the time I got back the parking lot, the clouds had let up a little (and it wasn’t snowing) and I got a little view.
Can you drive to Oyster Dome?
Driving all the way to Oyster Dome is not possible, but requires a hike. Visitors typically park at the Samish Bay overlook parking area and hike up to Oyster Dome via the designated trail. The journey involves a scenic hike with switchbacks through the forest. While the trek may be challenging, the reward of reaching the top and taking in the breathtaking panoramic views makes it all worthwhile. For the best views, go on a day when the weather is clear so you can see further.
How long does it take to hike the Oyster Dome?
Hiking to the Oyster Dome viewpoint is about a 4 mile round trip. I would say that it is a moderate hike, and should take most people about 2 hours to 2 1/2 hours to get up to the viewpoint and then back to the parking lot. A good plan is to time your hike to Oyster Dome and your return to the parking lot just before sunset. The view from the parking lot is really quite nice.
Oyster Dome Hike – Bellingham, Wa
The fact is that I sometimes pick hikes at random. My Oyster Dome hike was one of those semi-random “where should I go this weekend” type trips.
Usually, I try and have my weekend planned by Wednesday night, so I can be ready to head out on Friday or Saturday and not have to spend too much time prepping.
Hiking Oyster Dome was an interesting adventure and so typical of the PNW in the fall.
Basic Info On the Oyster Dome Trail
Depending on what site you look at, and what path you take, this is a 5-8 mile hike, with a moderate rating. That seems pretty accurate to me. Here are the links to the Oyster Dome hike on AllTrails and WTA.
Oyster Dome – All Trails
Oyster Dome – WTA
Lily and Lizard Lakes – The Dyrt
Parking Pass: Washington State Discover Pass
Dogs: Allowed on a leash
PDF Trail Map of Oyster Dome
Best Time of Year To Hike Oyster Dome
I hiked it in the late Fall and I definitely had the place to myself, but I also got zero view at the top. Summer I can see this trail being super busy. I would like to get back out there in the spring on a clear day and actually get to see the view.
I chose Oyster Dome because it had only a moderate gain, was a decent length hike, and potentially had some good views to offer. Now I wasn’t overly hopeful to get some breathtaking views since I was headed out on a cloudy day. I’m a master at hiking hills when they are covered by clouds and you can’t see anything.
Parking at the Oyster Dome Trail
The first challenge I hit was that when you drop “Oyster Dome Trailhead” into Google, it sends you to the lower trailhead on Chuckanut Drive. The only problem is that there isn’t actually a parking lot down there and you have to find a place alongside the road to park.
As it was dark as hell still when I got there, I skipped the hard parking, swung around, and went up to the parking lot at the Samish Overlook.
Up there is a proper parking lot, informational signs, and a pit bathroom. Unless you really have your heart set on doing the switchbacks all the way from Chuckanut Drive, I’d suggest parking up there.
Alternatively, there are two parking lots at the Blanchard Mountain Trail just down the road. It will make your hike to Oyster Dome longer, but if you want a little extra time on the trail, or the Samish Parking lot is too busy, these might be good alternate parking spots.
If you want to come at the trail from the north, there are some access trails off of B-1050 and B-1500 as well as the Blanchard Hill – Alternate Incline Trail. These also give you shorter access to the Lizard Lake Campground.
My Hike of Oyster Dome
Parking at the overlook, I decided to take the long way around to get to Oyster Dome, wanting to see as much of the park as possible, including Lizard Lake and Lily Lake.
The weather was gray and threatening rain as I headed out down the Larry Reed Trail. The hike along that trail as well as the Lily Max Connector, is for the most part, a pleasant walk in the woods. I enjoyed checking out all the ferns, mosses, trees, and tree stumps.
The Lily Lizard section of the trail was a little more challenging and as I approached Lizard Lake, the mist that had been floating around, decided to start ganging up and falling from the skies. I was glad I had my raincoat and got things buttoned down as I wandered into the campground.
Honestly, I hadn’t scouted the location enough to know anything about either Lizard Lake or Lily Lake campgrounds, or that they even existed.
Lizard Lake and Lily Lake Campgrounds
These are two adorable little hike-in campgrounds with a small number of established camp spots to use. Lizard Lake in particular, has some awesome spots that are pretty much right on the lake. I can see this place being pretty busy in the summer, and the camp spots aren’t that far apart. It might be fun early or late in the season. When I was there, I had the place to myself.
Lizard-Lily Connector Trail
The rain falling harder yet, I made my way off onto the Lily-Lizard Lake connector trail. This one is definitely more sketchy than the bulk of the main trails. No wild scrambles with the threat of life-ending falls, but it is more than a walk in the woods.
I am annoyed that I hadn’t done more research as I missed the side-quest of going up North Butte Trail to the summit which is actually higher than Oyster Dome. Next time I guess, on a day when I can see, well… Anything.
My Ascent of Oyster Dome
Mother Nature was intent on making my hike extremely wet, and as I took the right turn onto the main trail and headed toward the Oyster Dome trail, the rain kicked it up to second gear.
From the cutoff trail over to Oyster Dome trail, is a pretty walk. I do really love bridges, especially when they are in the middle of nowhere. Fairly randomly, there is a nice metal bridge. I’m always impressed by the things people build on trails far from where they can truck things in.
From this point on, the trail was steep, and solid ascent as you approach the viewpoint.
100 yards from the Oyster Dome overlook, Mother Nature dropped the hammer, and stepping out onto the giant dome of rock, I found that the rain had turned to slush and was blowing sideways. My view was a wall of white, though I could see the bottom of the hill where I would land if I went sliding off the side. Time to back up a step.
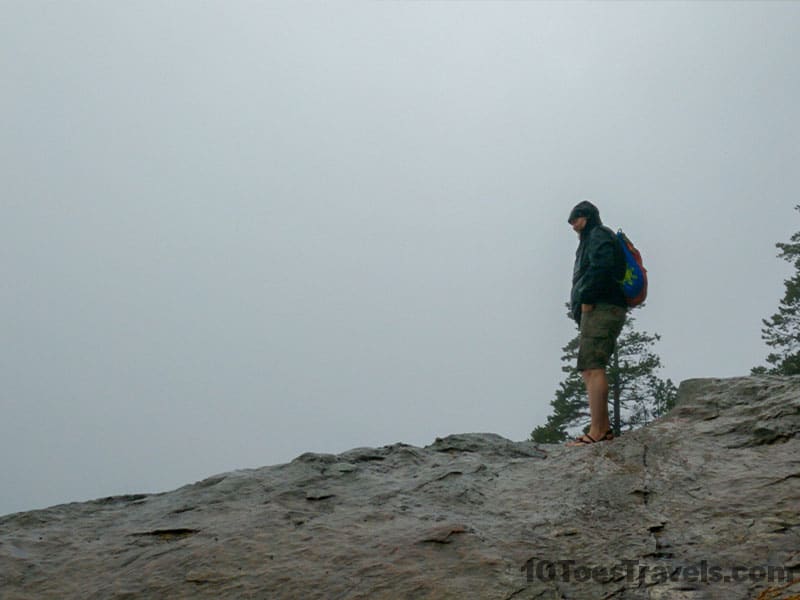
Very quickly I checked it out, shot some video, and with my fingers freezing in the driving slush, started back down. Should I have had my rain pants on at this point, yeah, but I was already too wet for them to help much.
Until I took the turn onto the Oyster Dome Trail proper, I had only seen two other people. Once I started to power climb through the rain to the top of the hill, I finally started running into other people.
Now plenty of people were headed up the trail as I came down, and as usual, I got a fair number of comments on me hiking in my sandals.
Back to the Overlook
Fleeing the slush-blown viewpoint, I headed down the Samish Bay trail back toward the parking lot. Honestly, I’m glad I did this trail the long way around. The trip back down was a nice series of switchbacks. There were a few cute little streams to cross, and I could see this being a challenging hike going from the other direction, especially if I was hiking it from Chuckanut.
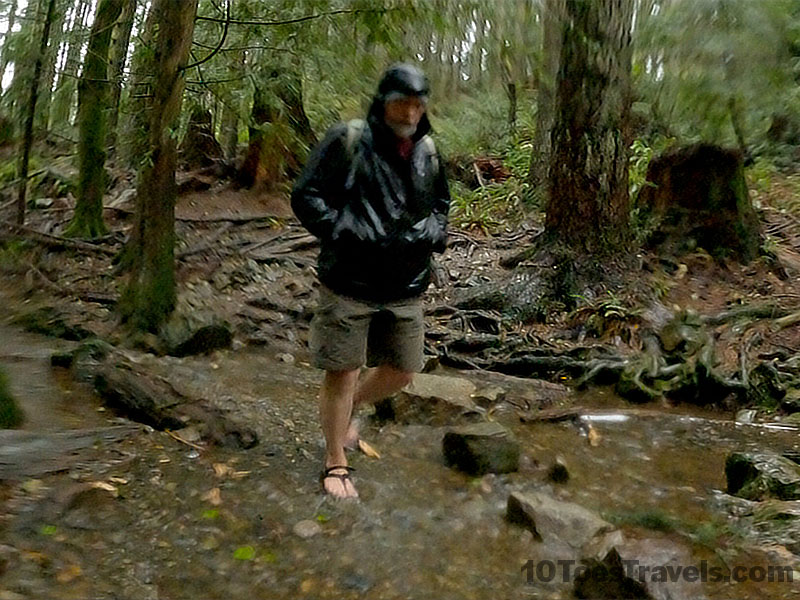
BTW the photos are a little blurry. Everything, including my camera was very wet.
Am I bummed that I didn’t get the awesome view from the top? Yeah, I had a good hike, but not getting to see anything just means I get to go back and do it again. Maybe I’ll be crazy and hike it form Chuckanut next time.
At least by the time I got back the parking lot, the clouds had let up a little (and it wasn’t snowing) and I got a little view.
Can you drive to Oyster Dome?
Driving all the way to Oyster Dome is not possible, but requires a hike. Visitors typically park at the Samish Bay overlook parking area and hike up to Oyster Dome via the designated trail. The journey involves a scenic hike with switchbacks through the forest. While the trek may be challenging, the reward of reaching the top and taking in the breathtaking panoramic views makes it all worthwhile. For the best views, go on a day when the weather is clear so you can see further.
How long does it take to hike the Oyster Dome?
Hiking to the Oyster Dome viewpoint is about a 4 mile round trip. I would say that it is a moderate hike, and should take most people about 2 hours to 2 1/2 hours to get up to the viewpoint and then back to the parking lot. A good plan is to time your hike to Oyster Dome and your return to the parking lot just before sunset. The view from the parking lot is really quite nice.
Table of Contents
Related Posts
11 Things To Always Pack In Your Carry-On
5 Winter Tips for Visiting the Washington Coast
7 Steps to Use a Travel Vision Board to Manifest Your Dream Vacation
21 Things You Should Never Pack in Checked Luggage
When Is the Best Time to Visit Olympic National Park?
Olympic Peninsula Big Tree Road Trip
About The Author
MadMadViking